
I’m Jordan, an e-learning developer for the totara.community. As well as administering the totara.community I also create courses for the Totara Academy. Over the past few years I’ve picked up a few tips and tricks to help you set up your own courses. Here are my top ten tips to help you when setting up new courses.
1. Create a course template
Are you making lots of courses which all follow a similar structure? If so, it’s worth spending a bit of time creating a course template. Back up this template course and when it comes to setting up your new course restore the backup of the template as a new course. You can use more than one template if not all your courses look the same.If you want to learn more about how to backup and restore courses take a look at these pages in our help documentation.
2. Use a sensible category structure
Having a sensible category structure for your courses helps keep your courses organized and lets you filter the course catalog by category. If you want to learn more about setting up a category structure, check out this Academy course on courses and categories.Another benefit to using categories is that you can filter reports you create to only show courses within a certain category. For example, you could use this to filter a report to look at the statistics of induction courses on your site.
3. Add tags and custom fields in your course settings
Adding custom fields and tags to your courses will allow you to easily set up filters in your course catalog, to make it easier for your learners to find relevant courses. Custom fields you might find useful include course duration, job title, language and course structure. You can see some of the custom fields we use on the left-hand side of our course catalog.
4. Set up course activity defaults
Courses in Totara Learn are made using activities. Each activity type has a number of setting that need to be configured when adding them to a course. To save time editing these settings each time you add an activity, it is worth setting up activity defaults. This can be done by navigating to the plugins area under the site administration menu, and then clicking the settings cog next to the activity you want to change the default settings for. This can save you from updating these every time you create a new activity. This can be especially useful with the SCORM activity where you may need to tweak a lot of settings for it to work correctly with your authoring tool.
5. Restrict access
If you have two groups of users who need to complete two slightly different versions of the same course, you may be tempted to build the course out twice and slightly alter the text each time.Instead of this, try using the restrict access functionality instead. You can use this to show or hide additional resources and activities. This will prevent you having to make two sets of amends when you edit a course.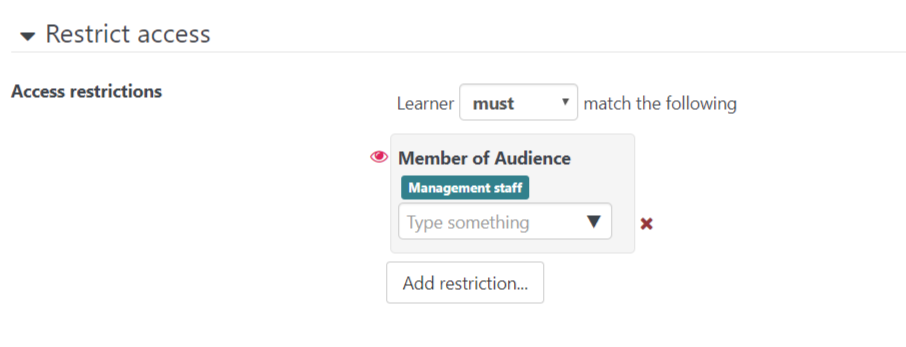 If you would like to know about how to set up access restriction check out this webinar.
6. Enable the recycle bi
How many times have you accidentally deleted something only to realize seconds later that you’ve made a massive mistake? Having a course recycle bin can allow you to restore any activities on a course page you have mistakenly deleted. In the site administration settings you can define how long deleted items should remain in the recycle bin.
7. Add tags to similar activities
Adding tags to similar activities can let you create reports and filter to only activities containing a certain tag. We use this in the academy to view statistics of SCORM packages tagged as being system simulations. Here is an example showing how we have used this tag to show us the number of incomplete attempts for each simulation – this shows us what simulations users are struggling with. Without the tags, the report would also show incomplete attempts for other SCORM content such as the Adapt tutorials.
8. Preview your course as a learner
A learner will see a different perspective of a course to a course creator. It is therefore essential that you preview your course from the perspective of a learner. There are two ways you could do this. The easiest is to use the switch role function in the course administration menu. The other way to do this is to create a separate user account that you use for testing (remember to make sure that this learner will have visibility of the course.)
9. Use reminders to gather more feedback
It can be disheartening to put a lot of effort into making a course only to receive little to no feedback. If you want to receive more feedback to contribute to your evaluation phase, you can set up reminder notifications which can be sent out after completing a course. You can decide the contents of the message here as well as specifying any time delays between completing a course and the notification being sent out. Course reminders can be configured in the course administration block.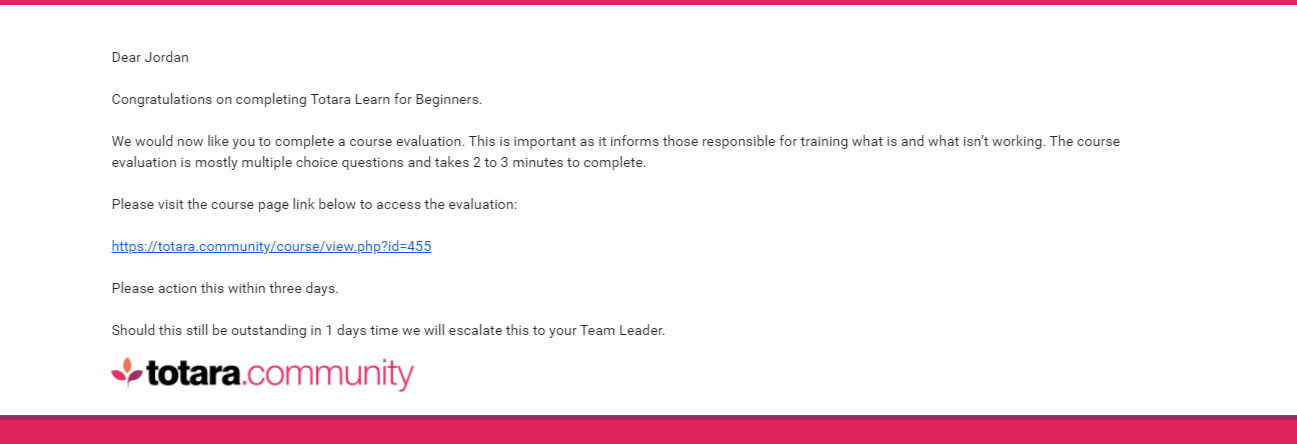
10. Use course reports
Most e-learning development frameworks will involve an evaluation phase. As well as using the feedback activity, another way you can evaluate the success of a course is by looking at the inbuilt course reports. The activity completion report can show you if there are any activities in your course that users are struggling with.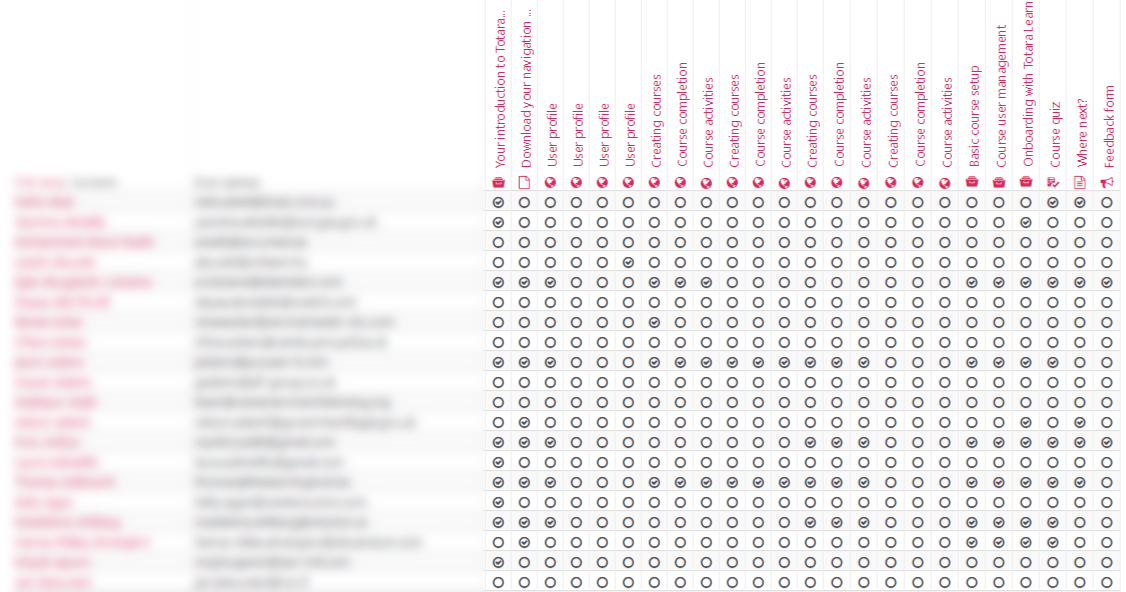
Want more tips?
Get your free totara.community account today for access to all of our Totara Learn courses to help you take your learning to the next level.